Mini Excavator Breaker Chisels: Shape and Replacement Fit
Mini excavator breaker chisels need to match both the material and the breaker’s tool interface. A pointed tip, flat chisel and blunt tool transfer force differently. Two tools with similar visible diameters may still have different shanks, retaining features or approved breaker applications.
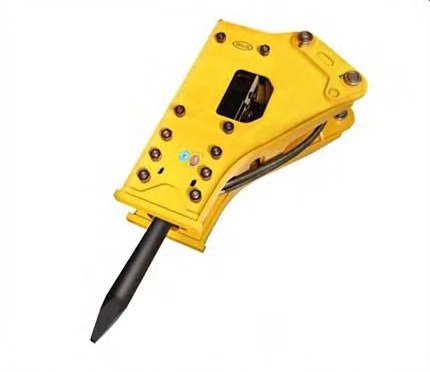
If you are choosing the entire attachment, start with the hydraulic breaker buying guide. This guide concerns the replaceable working tool: what its shape is intended to do and how to identify the correct replacement.
Choose the tip for the way the material breaks
Epiroc’s working-tool service card distinguishes penetration and wedge action from direct energy transfer. Its application examples also consider fissures and reinforcement, rather than treating hardness as the only selection factor.
| Tool shape | Useful distinction | What to clarify with the supplier |
|---|---|---|
| Conical moil point | Penetrates with wedge action around the point | Suitability for the material structure and required penetration |
| Flat chisel | Penetrates with a directional wedge action | Required orientation, fracture direction and permitted application |
| Blunt tool | Transfers impact energy without a penetrating point | Whether the task calls for impact fragmentation rather than penetration |
For example, the card differentiates reinforced and unreinforced concrete, and heavily fissured versus more intact rock. Use those distinctions to describe the job, then obtain a tool recommendation for the actual breaker. A generic “hard rock chisel” label leaves the fracture mechanism and tool fit unresolved.
Identify the upper shank, not just the exposed tip
Begin with the breaker model, serial number and parts catalogue. The worn tool’s visible end may no longer represent its original shape or working length. A seller’s photograph of a pointed end tells you little about the portion retained inside the breaker.
- Record the original part number and any superseding reference.
- Provide overall length, shank diameter and the specified measurement locations from the parts drawing.
- Show retaining slots, flats, grooves and their position relative to the tool end.
- State the required tip style and the material task.
- Ask which retaining pieces, bushes or other service items must be assessed with the replacement.
Measurements help verify an identified part; they do not replace a manufacturer’s fit specification. The parts diagram guide explains how to connect a drawing callout with an orderable part number and its applicability notes.
Investigate unusual wear before fitting another tool
Photograph the tool, retaining area and any damage before disposal. Note hours in service, material, lubrication product and any change in operating behaviour. Ask the service provider to assess the tool and its supporting parts against the breaker’s wear limits.
A new tip will not correct excessive internal support wear or an unsuitable operating practice. Use the exact breaker manual for inspection, isolation, tool removal and lubrication. There is no universal discard diameter or greasing interval that can be inferred from the excavator’s tonnage.
Make the replacement request traceable
Send the breaker identification, full parts-list row, photographs and intended application in one enquiry. Ask the supplier to confirm the working-tool code, compatible breaker variants and any accompanying service parts in writing.