How to Operate a Mini Excavator: Beginner’s Guide
News | September 18, 2026
A mini excavator can complete precise digging, trenching, landscaping and demolition work in places where a full-size excavator cannot fit. It can also be unforgiving for a new operator because the machine uses hydraulic controls, tracks and a swinging upper structure. The safest way to learn is to understand the controls before starting the engine, practice in an open area, and follow the manufacturer’s operator manual for your exact model.
Quick Answer: How Do You Operate a Mini Excavator?
1. Complete a pre-start inspection and confirm that utilities have been marked.
2. Enter the cab or platform safely, fasten your seat belt and lower the control lock.
3. Check the control pattern and identify the boom, arm, bucket, swing and travel functions.
4. Start the engine at low throttle and allow it to warm up.
5. Keep the bucket low when traveling and move the tracks slowly.
6. Dig in controlled passes with the arm and bucket rather than forcing the boom.
7. Keep bystanders outside the swing radius and stop immediately if communication is unclear.
8. Park on level ground, lower the bucket, engage the controls lock and shut down correctly.
Controls differ between brands and models. A machine can use ISO or SAE/backhoe control patterns, pilot joysticks, mechanical levers, foot pedals or electronic travel controls. Always confirm the pattern shown on the machine decals and in the operator manual before moving the machine.
What Is a Mini Excavator?
A mini excavator is a compact tracked excavator, generally in the 1–5 tonne class. It normally has a boom, arm, bucket, 360-degree upper structure and rubber or steel tracks. Common applications include landscaping, residential construction, drainage, utility trenching, farm renovation, stump removal and interior demolition.
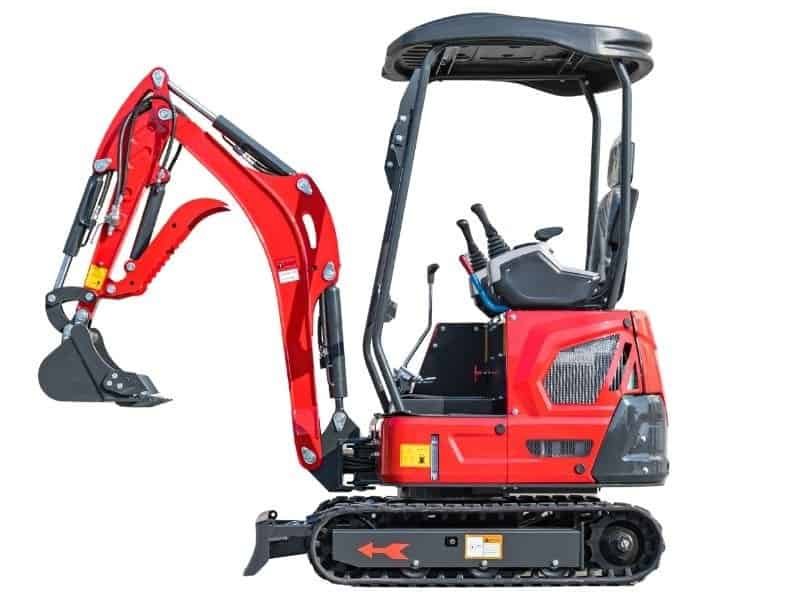
Size affects stability, reach, lifting capacity and transport requirements. A smaller machine can pass through gates and work inside buildings, while a larger mini excavator provides more digging depth and lifting capacity. If you are comparing classes, read our mini excavator weight and size guide.
Before You Operate: Pre-Start Checklist
Most accidents begin before the first bucket of soil is moved. Walk around the machine and inspect the work area before starting the engine.
1. Read the Operator Manual
Review the control pattern, daily inspection points, lifting limits, slope limits and emergency shutdown procedure for your model. Do not assume that two mini excavators operate the same way.
2. Wear the Correct PPE
Use the personal protective equipment required by the site, which may include a hard hat, safety boots, eye protection, hearing protection and high-visibility clothing. Avoid loose clothing that can catch on control levers.
3. Inspect the Machine
• Check engine oil, coolant, hydraulic fluid and fuel levels.
• Look for hydraulic leaks, damaged hoses, loose fittings or unusual wear.
• Inspect tracks, sprockets, idlers and track tension.
• Check the bucket, teeth, pins, bushings and quick-coupler locking mechanism.
• Confirm that lights, alarms, gauges and the emergency stop work correctly.
• Remove debris from the operator area and make sure the seat and controls are secure.
4. Inspect the Work Area
Locate underground utilities before digging. In the United States, call 811 or use the applicable local utility-location service. Mark overhead power lines, gas lines, water lines, fiber cables and drainage pipes. Keep bystanders, vehicles and temporary structures outside the working radius.
5. Check Ground Conditions
Look for soft ground, hidden voids, steep slopes, unstable walls and areas where the machine could slide or tip. Use the correct track width and do not assume that a compact machine is stable on every surface.
How to Use Mini Excavator Controls
This section explains how to use a mini excavator’s joysticks, travel levers and auxiliary controls before you begin work.
Joysticks and Control Patterns
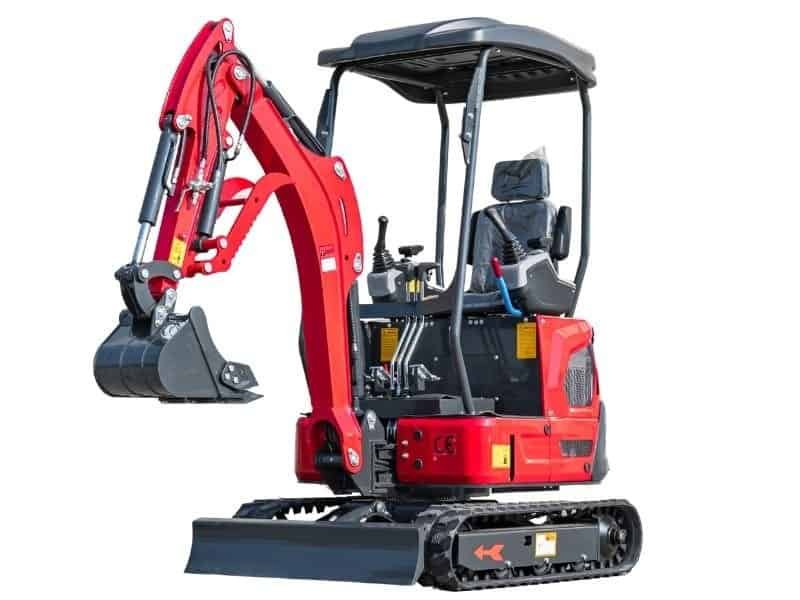
On many mini excavators, the left joystick controls the arm and swing while the right joystick controls the boom and bucket. This is commonly called the ISO pattern. Other machines use the SAE or backhoe pattern, which changes the relationship between the joystick movements and machine functions. Some models allow the operator to switch patterns with a lever, switch or electronic setting.
Before operating, move each function slowly at low engine speed to confirm the pattern. Never rely on memory from a different machine.
Pilot Controls
Pilot controls use low-pressure hydraulic pressure to move the main control valves. They require less physical effort than mechanical levers and provide smoother, more precise movement. If the machine feels delayed, stiff or unpredictable, stop and inspect the hydraulic system rather than increasing engine speed.
Travel Levers or Pedals
Tracks are normally controlled by two levers or pedals. Pushing both forward moves the machine forward, pulling both backward moves it in reverse, and moving one track at a time turns the machine. Counter-rotating the tracks allows a compact excavator to turn in a very small area, but it should be performed slowly on firm ground.
Dozer Blade and Auxiliary Functions
A dozer blade can improve stability, backfill trenches and level material. Auxiliary circuits may operate a breaker, auger, thumb, grapple or quick coupler. Confirm which pedal, button or roller controls the auxiliary circuit before connecting an attachment.
Throttle, Gauges and Shutdown Controls
Use low throttle when starting, warming up or learning controls. Monitor temperature, oil pressure, battery charge and warning lights. Know the location of the engine stop, hydraulic lock and emergency shutdown controls before you begin work.
How to Start a Mini Excavator
1. Enter the operator station using the recommended handholds and steps.
2. Sit down, fasten the seat belt and confirm that the control lock is engaged.
3. Place the travel controls in neutral and move the throttle to the low-idle position.
4. Turn the ignition key or press the start button according to the manual.
5. Allow the engine to warm up until it runs smoothly and the gauges are normal.
6. Check for unusual noise, vibration, smoke or hydraulic leaks.
7. Raise the bucket slightly, release the control lock and test each function at low speed.
8. Confirm the control pattern and travel direction before leaving the starting position.
How to Drive a Mini Excavator
Driving a mini excavator is different from driving a car. The machine uses tracks, the upper structure can rotate independently, and travel direction depends on how the tracks are positioned relative to the operator.
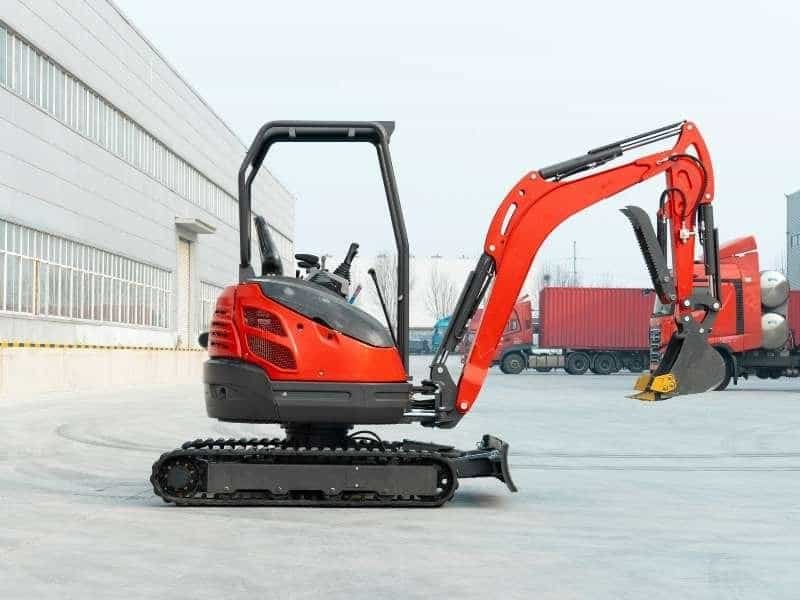
Watch a Mini Excavator in Action
1. Clear the Area
Make sure no one is standing beside or behind the tracks. Establish a clear verbal or hand signal with any spotter and agree that all movement stops if communication becomes unclear.
2. Keep the Bucket Low
Carry the bucket low and close to the machine, typically around 6–12 inches above the ground when conditions allow. A raised bucket raises the center of gravity and reduces visibility.
3. Confirm Travel Direction
Move each track a short distance to confirm which direction is forward. On many tracked machines, the idler wheel is toward the front and the drive sprocket is toward the rear, but this varies. Follow the travel decals and operator manual.
4. Use Smooth Movements
Push or pull both travel levers evenly. Avoid sudden starts, hard stops and rapid counter-rotation. Smooth inputs reduce track damage and make the machine easier to control.
5. Travel on Slopes Carefully
Whenever possible, travel straight up or down a slope rather than across it. Keep the heavy end of the machine uphill, keep the bucket low and reduce engine speed. If the tracks begin to slip, move to firmer ground and reassess the route.
6. Cross Obstacles Slowly
Approach curbs, roots and uneven ground at a low angle. Do not allow the machine to drop off an edge or balance on one track. If the machine begins to tip, lower the bucket immediately and stop movement.
How to Dig with a Mini Excavator
Digging is a sequence of controlled movements, not a test of engine power. Position the machine so the bucket can reach the work area without excessive side loading.
Step 1: Position the Machine
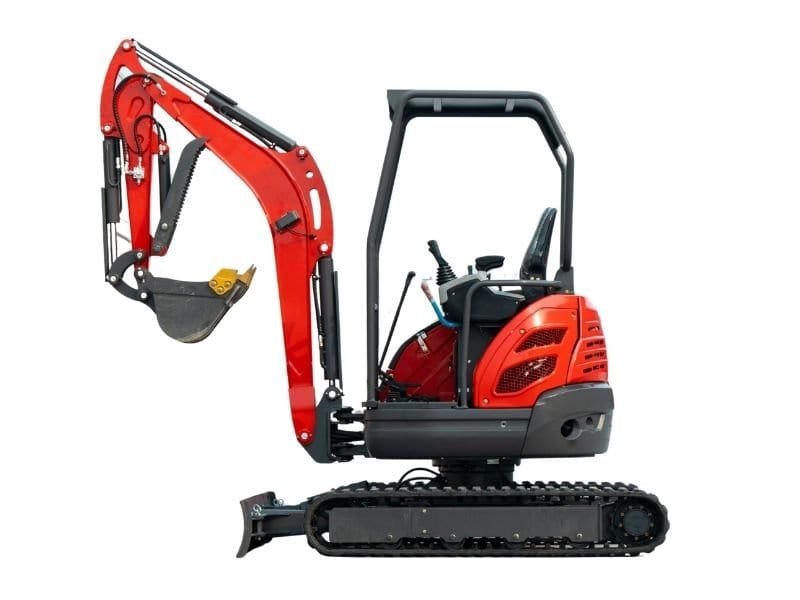
Place the tracks on firm, level ground and, when possible, position them parallel to the trench. Lower the dozer blade if the machine is equipped with one. Keep the work area within the reach of the boom and avoid working at maximum extension.
Step 2: Start with a Shallow Pass
Lower the bucket with the teeth angled slightly downward. Use the arm and bucket to cut the soil rather than forcing the entire boom. Remove shallow layers and maintain control instead of taking a full bucket in one movement.
Step 3: Curl and Lift
Close the bucket as you pull the arm toward the machine. Keep the load close to the undercarriage and lift smoothly. If the machine begins to rock, reduce the load or reposition the machine before continuing.
Step 4: Swing and Dump
Swing the upper structure slowly toward the spoil pile or truck. Do not swing over people, vehicles or utilities. Dump the material, then return the bucket to the digging position without striking the ground.
Step 5: Maintain a Safe Trench
Keep spoil piles back from the trench edge and follow the excavation and trench-safety requirements for the site. Never enter an unprotected trench. If the excavation is deeper than the safe limits for the soil condition, use appropriate shoring, sloping or protective systems.
Lifting with a Mini Excavator
Lifting capacity changes with reach, boom position, bucket weight and ground conditions. Use only the approved lifting point and load chart. Keep the load close, avoid side loads and never exceed the rated capacity. Do not use the bucket as a work platform or lift people.
How to Backfill and Grade
After digging, place material in shallow layers and compact it according to the project requirements. Use the bucket to move material toward the trench and the dozer blade to spread and level it. Work from the far end toward the machine so you do not trap yourself against a wall or slope.
For final grading, keep the bucket flat and use slow, overlapping passes. Check the grade frequently instead of making large corrections at the end. Remember that a mini excavator is not a compactor; compact fill material with the correct equipment.
Mini Excavator Safety Rules
• Operate only when trained, authorized and physically able to control the machine.
• Follow the operator manual, site rules and local excavation regulations.
• Keep bystanders outside the swing radius and never allow riders.
• Use the seat belt when the machine is equipped with one.
• Keep the bucket low while traveling and avoid sudden control movements.
• Do not dig near live utilities or overhead power lines without proper isolation and clearance.
• Do not work beneath an unsupported boom, bucket or load.
• Stop immediately if you hear an alarm, feel unusual vibration or lose visibility.
• Shut down, lower the bucket and lock the controls before leaving the operator station.
Common Beginner Mistakes
• Assuming that every machine uses the same joystick pattern.
• Traveling with the bucket too high or the load too far from the machine.
• Turning or swinging too quickly in a confined area.
• Digging at maximum reach and overloading the front of the machine.
• Working across a slope instead of straight up or down.
• Ignoring underground utilities or failing to confirm their exact location.
• Allowing a spotter to stand inside the swing radius.
• Using the bucket to lift people or pull heavy objects.
How Long Does It Take to Learn How to Operate a Mini Excavator?
An operator can learn basic starting, traveling and digging movements after several hours of supervised practice in an open area. Becoming efficient at trenching, grading, loading and working around obstacles usually takes days or weeks of regular operation. The learning time depends on the machine, the type of work, the operator’s experience and the quality of training.
Licensing and certification requirements vary by country, state and job site. Check local regulations and employer requirements before operating on a commercial project.
What Size Mini Excavator Do I Need?
The best size depends on access width, digging depth, lifting requirements, soil conditions and transport method.
| Machine Class | Typical Use |
|---|---|
| 1–1.5 tonne | Tight access, landscaping, small trenches, interior demolition and residential projects. |
| 1.8–2.5 tonne | Deeper digging, more lifting capacity, farm work, drainage and larger landscaping projects. |
| 3–5 tonne | Heavier excavation, longer reach and higher productivity where access and transport allow. |
Compare our 1 Ton Mini Excavator, 1.2 Ton Mini Excavator, 1.5 Ton Mini Excavator, 1.8 Ton Mini Excavator, 2 Ton Mini Excavator and 2.5 Ton Mini Excavator.
For more information, read our mini excavator cost guide and mini excavator attachments guide.
Frequently Asked Questions
How hard is it to operate a mini excavator?
A mini excavator is manageable for a beginner after proper instruction. The basic controls can be learned quickly, but smooth digging, grading, lifting and working around obstacles require practice under supervision.
Do I need a license to operate a mini excavator?
Requirements vary by country, state and job site. Some locations require no formal license for private use, while commercial, public or employer-controlled projects may require training, certification or a competency card. Check local regulations before operating.
How do you drive a mini excavator?
Use the two travel levers or pedals to move each track. Push both forward to travel forward, pull both backward to reverse, and move one track at a time to turn. Keep the bucket low, use low speed and travel straight up or down slopes whenever possible.
What are pilot controls on a mini excavator?
Pilot controls are low-pressure hydraulic joysticks that operate the main hydraulic valves. They require less operator effort and provide smoother, more precise control than mechanical levers.
How deep can a mini excavator dig?
Digging depth depends on the machine class, boom and arm configuration, bucket and ground conditions. Smaller models typically dig less than larger models. Always use the manufacturer’s specification for the exact machine rather than a general class estimate.
Can a beginner drive a mini excavator?
Yes, under proper supervision and in a clear area. Begin with the engine at low idle, practice travel functions without a load, and only start digging after you can control the tracks, swing and bucket smoothly.
Can you operate a mini excavator on a slope?
Only within the manufacturer’s slope limits and the site’s safety requirements. Travel straight up or down the slope when possible, keep the bucket low, reduce speed and avoid loose or unstable ground.
Explore Our Mini Excavator Models
Compare compact excavators from 1 to 2.5 tonnes by working width, digging depth, engine power and attachment options.
Looking for a Mini Excavator for Your Next Project?
Qisheng Machinery supplies compact excavators from 1 tonne to larger mini excavator classes, with engine options, attachments and OEM/ODM customization for different markets. Review the mini excavator product range or request a factory-direct quote for your required digging depth, working width and attachment package.
This guide is for general educational purposes. Always follow the operator manual, employer procedures and local safety regulations for the specific machine and job site.