How to Use a Mini Excavator: Controls and First Tasks
Qisheng Machinery · Updated October 18, 2026
Quick Answer
To learn how to use a mini excavator, start with the exact machine's manual, a supervised handover and a clear practice area on firm, level ground. Identify the active control pattern before moving a joystick. Then practise individual functions, straight travel and a small digging task under instruction. Smooth control and a planned stopping point matter more than speed.
This page covers the first-use handover and practice session. Use our mini excavator operation guide for the broader operating workflow, and the driving guide for travel preparation.
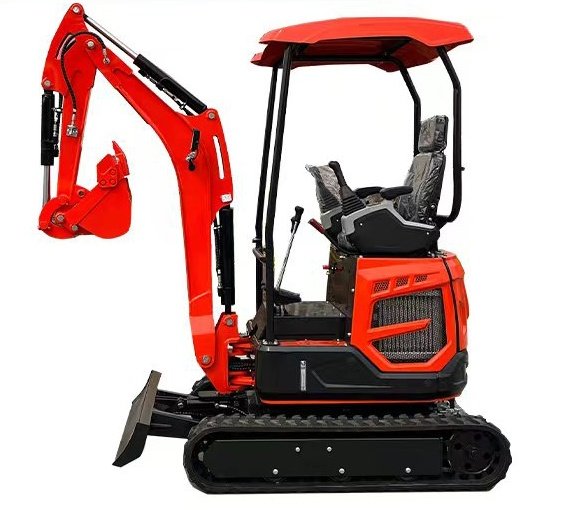
Identify the Controls on Your Machine
Do not learn left-hand and right-hand functions from an unlabelled online diagram. Mini excavator controls can use different patterns, and some machines have a selector. For example, Takeuchi lists a pattern-change valve on its TB216. That feature does not establish the layout or equipment fitted to a QS machine.
Ask the person handing over the machine to identify these functions using its control labels and manual:
| Function | What to confirm before practice |
|---|---|
| Boom and arm | Which control and direction operate each joint in the active pattern |
| Bucket | Curl and dump directions; the attachment actually installed |
| Upper-structure swing | Control direction and the clear area needed around the machine |
| Travel | Travel levers or pedals, undercarriage orientation and stopping response |
| Blade and boom offset | Their separate controls, where fitted, and permitted use |
| Hydraulic lockout and engine stop | How to isolate the controls and shut down the exact machine |
Keep the controls neutral during the explanation. If labels are missing, the selected mode is uncertain or movement differs from the handover, stop and resolve the discrepancy. Do not swap hydraulic hoses to imitate a familiar pattern.
Complete the Pre-start Walk-around
Check tracks, hoses, pins and visible fluid leaks. Confirm that the bucket or quick coupler is secured using its specified inspection procedure. Check fluid levels and service items in the positions prescribed by the machine manual; different systems require different checking conditions.
Inspect the practice area as carefully as the machine. Confirm ground support, overhead clearance, underground-service information and separation from pedestrians. Agree how the instructor or spotter will communicate and where they will stand. The UK HSE excavator guidance calls for operators trained and authorised for the specific excavator, daily checks and prompt action on safety-critical defects.
Your First Five Tasks
The instructor should set the engine speed, warm-up procedure and practice sequence from the manual. The following are learning objectives, rather than a substitute for that demonstration.
| Task | What a successful first attempt shows |
|---|---|
| Enter, adjust the seat and fasten the belt | The operator can reach the controls without stretching and understands the lockout |
| Identify and test one function at a time | Actual movement matches the labelled pattern, with the area clear |
| Practise straight travel and stopping | The operator has confirmed travel direction and can stop where intended |
| Make a small, supervised digging pass | Bucket position and material release remain controlled |
| Park and shut down | Attachments, controls and engine are left in the condition required by the manual |
If you are searching for how to operate a mini digger, the same handover questions apply: “mini digger” does not identify a particular control layout. Do not progress to confined access, slopes or loading a trailer simply because the first digging pass went well.
Plan the Digging and Dumping Area
Keep bystanders away from the swing area and never move a load over a person. Establish the machine position, spoil location and excavation-edge precautions before digging. Track orientation alone does not establish a safe distance from a trench; ground conditions, excavation support and the site plan govern the setup.
Do not use the bucket as a battering ram or swing it into the spoil pile. If the task is beyond the machine's reach, stop and reassess the setup. Our mini excavator digging depth guide helps distinguish a catalogue maximum from the reach required for the job. Suspended-load lifting needs its own equipment ratings and lift plan; it is not a first-use practice exercise.
Frequently Asked Questions
Is a mini excavator easy to use?
An instructor can demonstrate the basic functions, but knowing the levers is only part of operating. Ground assessment, visibility, attachments and work near people require training and judgement. A short practice session does not establish competence for every job.
What do the two joysticks control?
They operate the digging and swing functions according to the machine's active pattern. Identify each direction from the exact manual and labels. Do not assume that another excavator's left/right arrangement applies.
Can a mini excavator do the work of a full-size excavator?
It can suit smaller tasks and restricted access, but the required reach, lifting capacity and working space still decide suitability. A similar bucket movement does not imply equal capacity.
Related Guides and Model Information
Compare mini excavator models, including QS-12, QS-18 and QS-25. If you are buying a new mini excavator, request a factory-direct quotation with the intended task and configuration, and ask for the matching operating documents before use.